
Blanket Gun Covers
By Mike Nesbitt
 Winter is a good time for doing things indoors. Reloading is always a first consideration. Then I like to make certain accessories and one of those becomes the subject at hand. The things I’m talking about, as if the title on this page didn’t warn you, are gun covers, called gun cases by a lot of us. Our guns need protection, particularly while being transported to those hunts or shoots we like to attend. It is simply easy to say how a good gun cover can be worth more than its weight in leather or wool.
Making blanket gun covers is something I enjoy doing and sometimes I like to set aside such tasks just for cold rainy days when I can sit beside the fire in the main lodge and sew a good gun cover together. What those gun covers are made out of has a lot of bearing on how well they will protect the gun when the gun covers are being used.
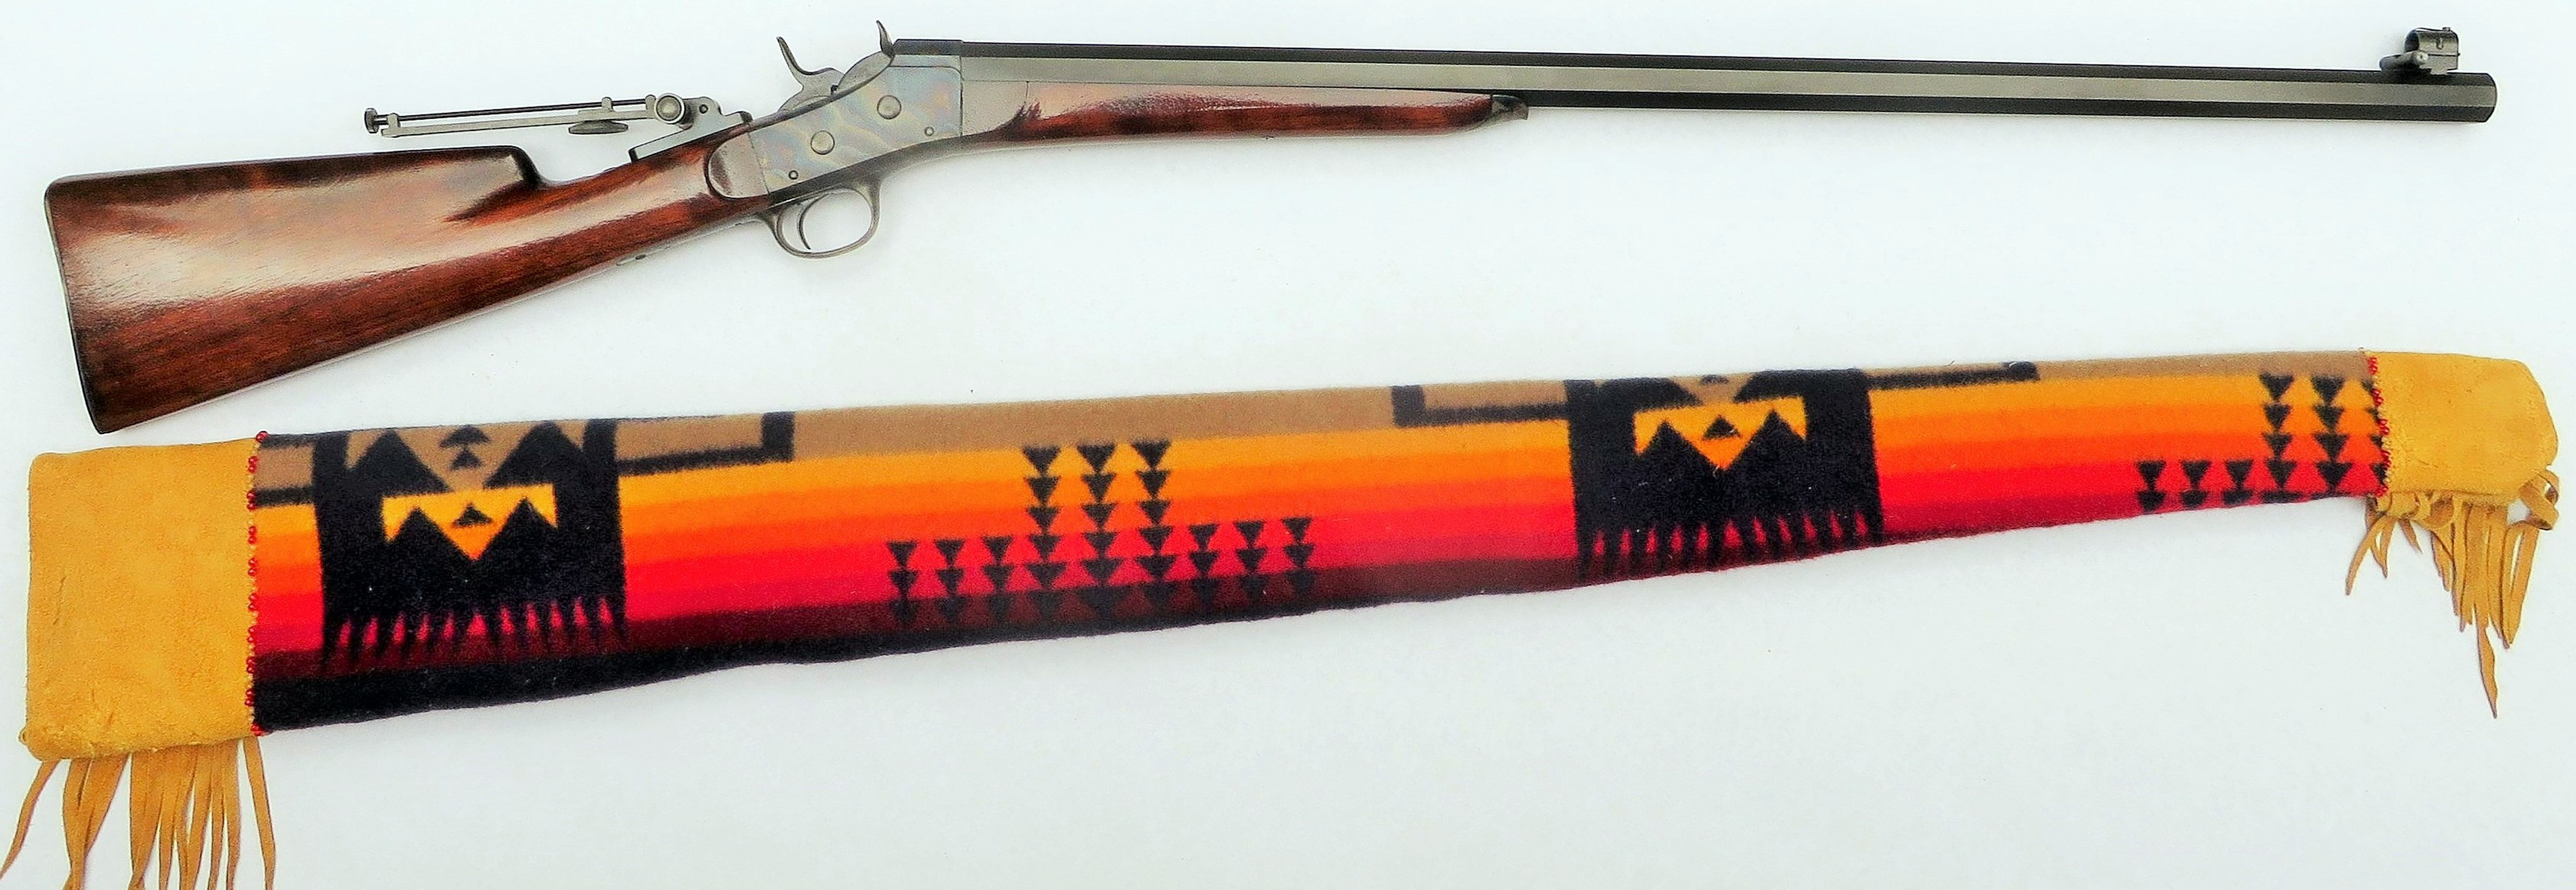
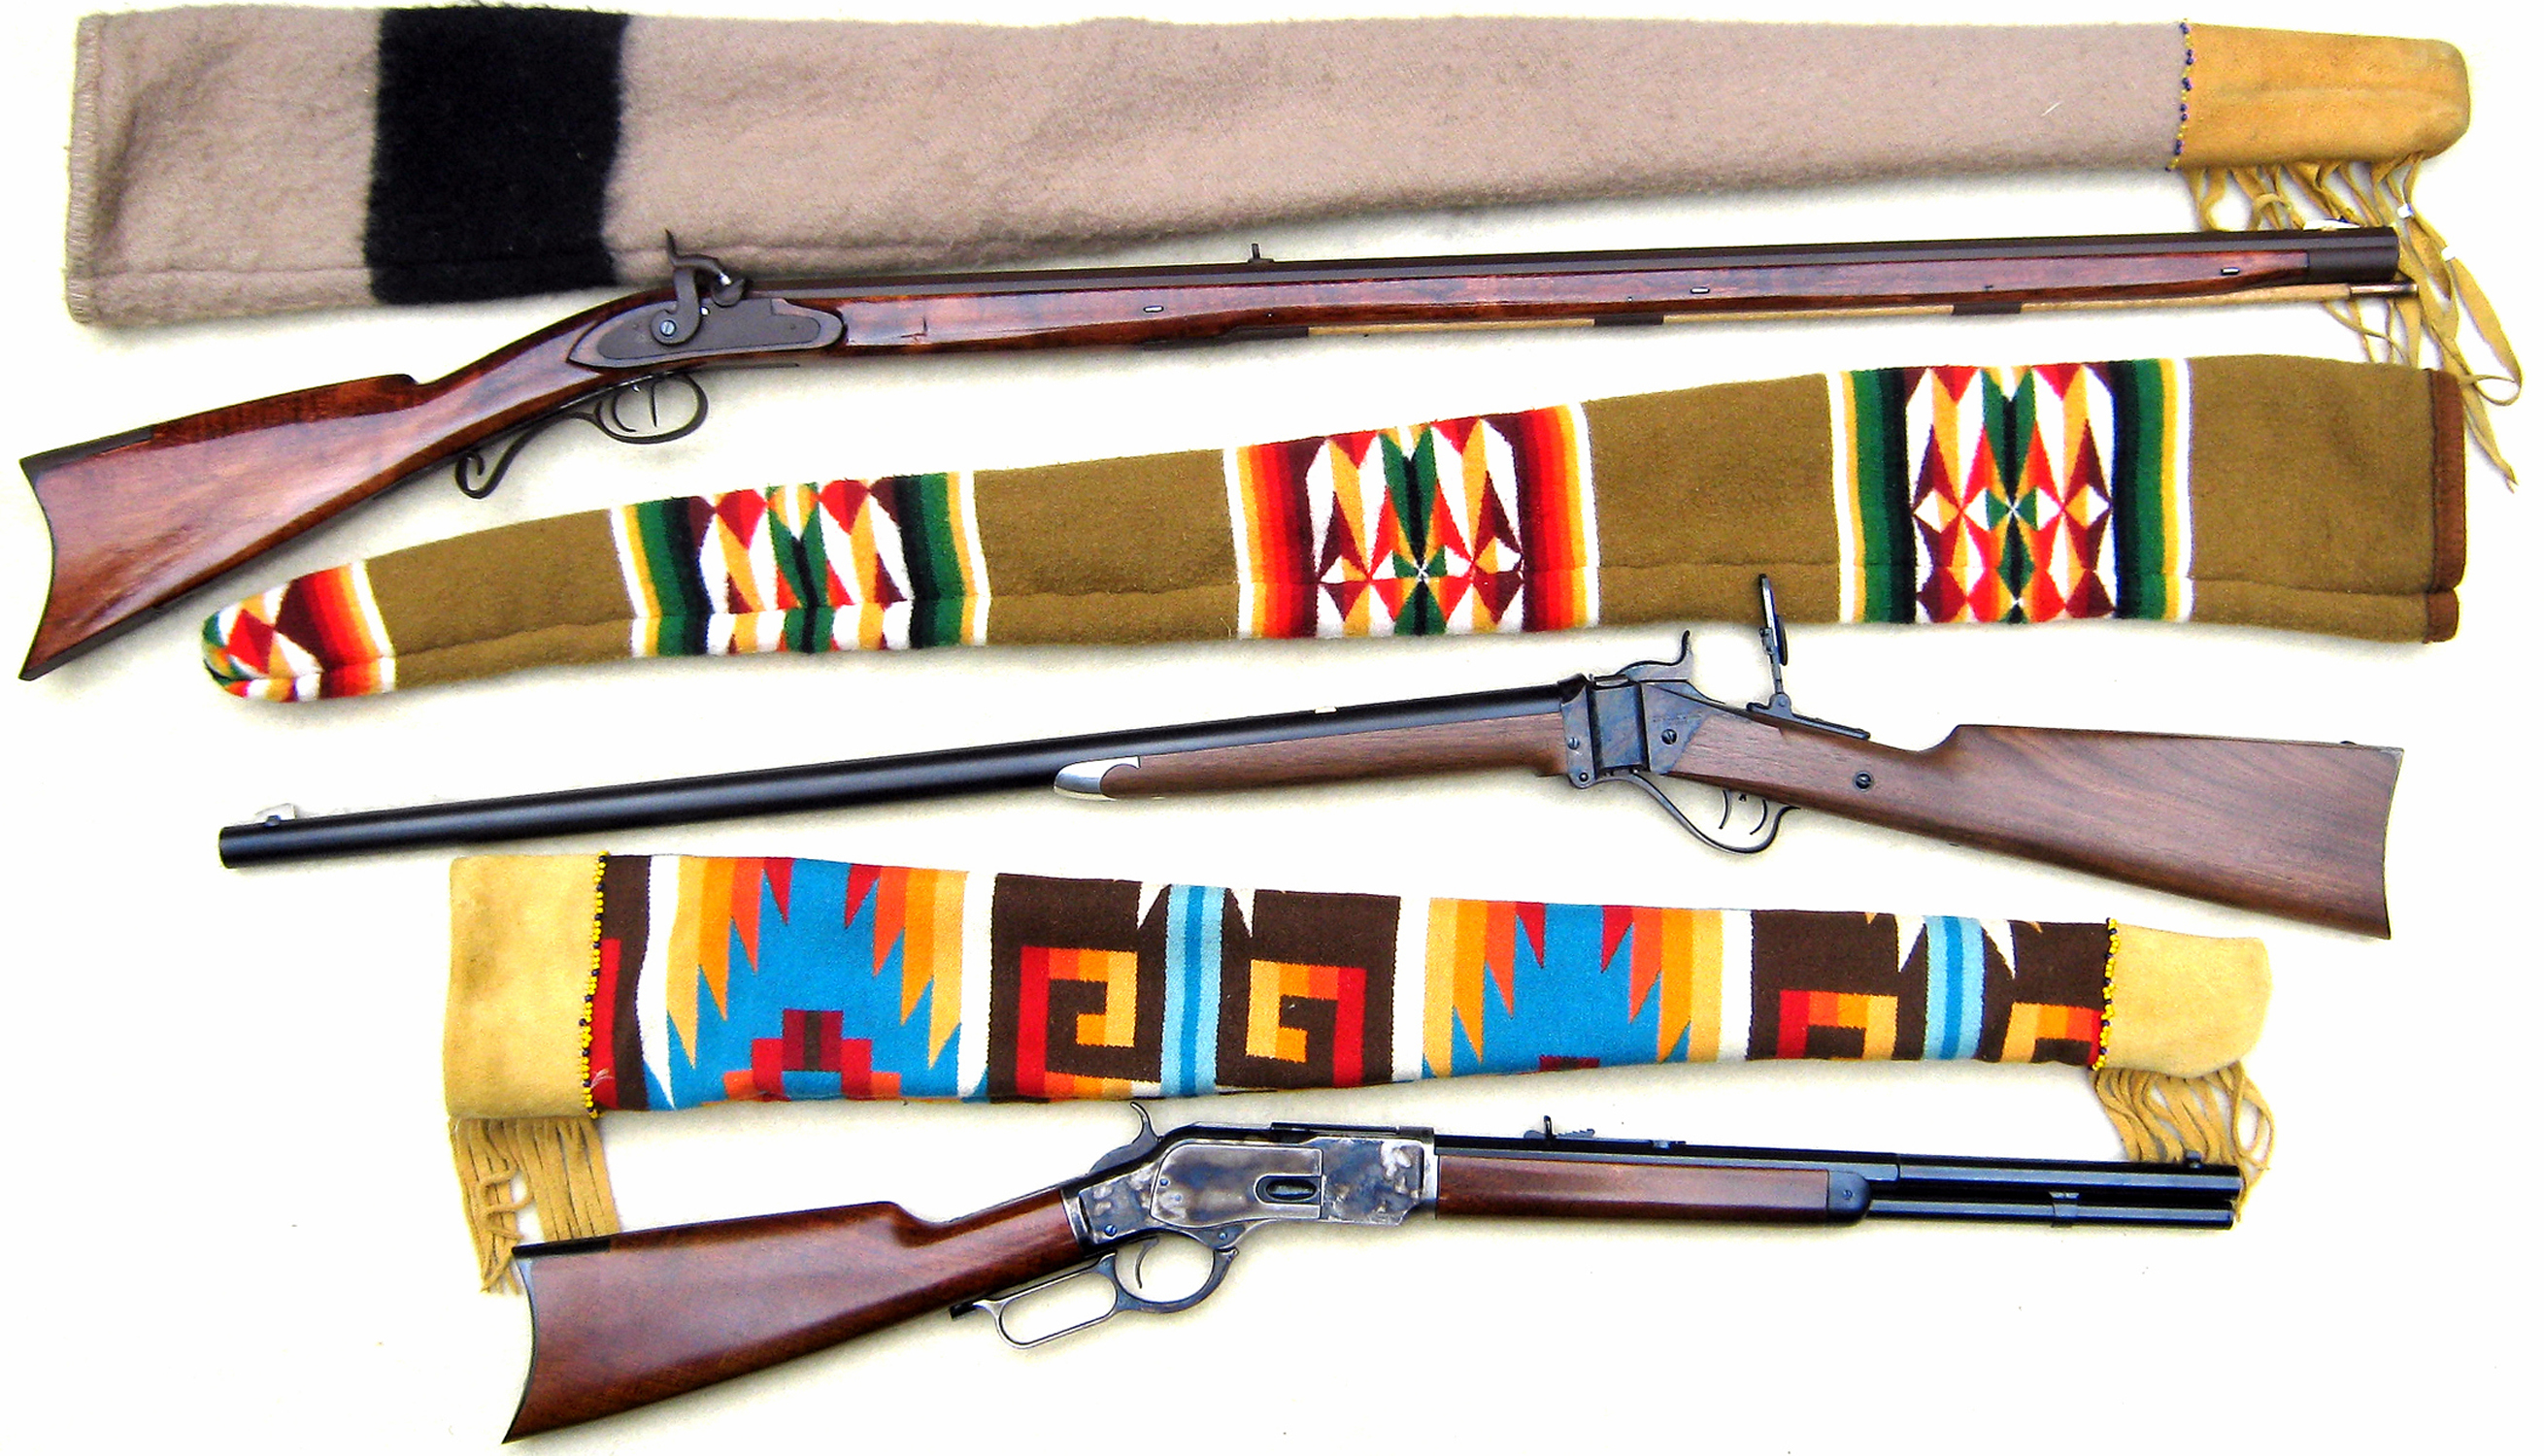
While this chat focuses on making rifle covers with blanket material, we could easily use leather. But I really do favor blanket material, especially wool blankets for a couple of very good reasons. For one thing, the softer but thicker blanket material offers more padding for the gun than leather. Also, the blanket material “breathes” much better than leather so the gun is not as subject to maintain moisture if any wetness is encountered. If you’d rather use leather, perhaps to duplicate the leather rifle cover that Quigley used in the movie or one like what John Wayne used in The Searchers, go for it. I like the leather covers too, and I do have a “Quigley style” gun cover for my Sharps .44/90, but they don’t protect the gun quite as well as a cover made from good thick blanket material.
Where to get blankets for cutting into covers is a fairly easy question to answer. For my Sharps rifles I like to use the Indian designs from Pendleton and you can find remnants on eBay for sale. Buying remnants is, of course, much less expensive than buying a new blanket. Just be careful and look for thick blanket pieces and not the thinner materials. Likewise, when making a gun cover for a Hawken or a Leman and authenticity is desired, Hudson’s Bay Company or Witney “point blankets” are preferred and again we can turn to eBay and look for used, worn blankets which are called “cutters.”
You can also buy a blanket gun cover either fully made or in kit form from Northwest Traders; these are made in either 5’ or 5 ½’ lengths, mostly with muzzleloaders in mind. Personally, I prefer the kits so I can put them together my own way. To see more about the gun covers from Northwest Traders look on their web site at www.nwtrader.com. Those kits come with needles, yarn for sewing, and instructions.
Making a pattern is easy. For length just measure the length of your rifle. Rather than actually measuring the length of the rifle, I often just lay the gun down on the material and then add a couple of inches at each end to be sure the gun will be completely covered. If you want the gun cover to be long enough to fold around the butt and tied closed, add maybe eight more inches. At the muzzle end of the gun cover you should cut the blanket piece seven inches wide. That’s plenty for the muzzle of the gun with a standard blade front sight but add another inch to that width if you are making a gun cover for a rifle with a covered or hooded target sight. Maybe more if that front sight is windage adjustable. Then at the butt end of the gun cover should be about fifteen inches wide. That makes, so far, a long tapering piece of blanket that, when folded over lengthwise, begins to look like your next gun cover.

Without leather ends or fringe on the gun cover, that tapered piece of blanket is all you need. For sewing use artificial sinew, but other threads or even fishing line can certainly be used. Fold the gun cover inside-out and begin stitching. I begin at the muzzle and use a very simple blanket or straight stitch with a single needle. Then, after sewing from the muzzle end to the butt end of the gun cover, I just put a double loop around the end and go right back toward the muzzle; turning that single stich into a double stitch all along the seam. Others might prefer to do the same thing with two needles. Once the stitching is done, and the knot is burned so it won’t come untied (if using artificial sinew), the gun cover is completed, ready to be turned right-side-out and put to use.
If buckskin ends are wanted on the gun cover, put those pieces of buckskin on first. For the front piece, just sew the leather to the blanket at the rear part of the leather piece and be sure you are adding it to the side that will become the outside. For this I generally use chrome tanned buckskin, but I do always attach it so the fuzzy side shows. Having the soft or fuzzy side exposed makes it look more like brain-tanned leather which is more authentic for mountain man or buffalo hunter doin’s.
Also, there are sources, such as Crazy Crow Trading Post (http://www.crazycrow.com), where “German tanned buckskin” can be purchased. The German tanned skins are “fuzzy” or suede on both sides, much like brain tanned hides. I like using the skins with suede on both sides for cutting into fringe.
Adding the leather to the bottom or large end of the gun cover takes a much larger piece of leather and it is also a bit more work. That piece must be sewn on each end; first where it will show on the outside of the gun cover and, next, folded over the end of the gun cover so it will be on the inside when the cover is completed.
Also, the whip stitch where the buckskin meets the blanket will always be visible and that can be decorated, if desired, by adding small beads, just one bead with every stitch. On some of my gun covers blue and yellow pony beads were used and that adds an interesting touch to the gun cover as well as a good bit of individualism. Red or black beads are often used to make a contrasting line where the blanket and leather meet when the cover is completed.
On my gun covers only the leather part is given fringe but more could be added. I like to cut the fringe pieces of leather into two small rectangular sections, one to hang down along the bottom of the gun cover, as it’s being carried with the gun horizontal, and a smaller section of fringe leather to be cut for the nose or the front end of the gun cover. After the gun cover is finished and turned right-side out, the fringe is cut with a good pair of scissors from those rectangular pieces.
Now the gun cover is ready to be sewn up; to do this I prefer to do this inside-out so the seam will be hidden after the gun cover is completed. Roll the fringe pieces so only the part which will be sewn into the seam is available and begin at the top of the muzzle end of the gun cover. This is also through the leather which is at the front. Cut a length of artificial sinew more than three times as long as the gun cover itself and begin with a single loop which can be tied with an overhand knot.
The stitch I use is often called the ‘lazy stitch,’ just go through the gun cover material in one direction, move over about 3/8” and then go back the other way. Continue that all the way to the butt end of the gun cover. This is done about 3/8” from the edge of the blanket. Don’t get too close because that might pull through. The blanket material can be stretched, so along the way check your alignment now and then to be sure the buckskin nose piece and any blanket stripes will line-up when the gun cover is completed.

The alignment of any stripes on the blanket can be something to be careful about. So, I get those stripes, or other figures in the design of the blanket, lined up in advance of my stitching and then held in place with the springy paper clips, or paper clamps; clothes pins might also do.
Sew the gun cover together and turn it right-side out. Cut the hanging leather pieces into fringe and your gun cover is ready. More importantly, your gun cover is ready to contain and protect your gun.
In our discussion I’ve only told you how I like to make gun covers for my own guns. Many of you will prefer to go even further with certain steps. Wouldn’t it be pretty if the pieces of buckskin which are added to the ends of the gun cover were beaded with the designs of your choice before they were sewn to the blanket? That would be a highly individualistic item and very beautiful too. Of course, there is certainly nothing wrong with putting the gun cover kit together the way Northwest Traders suggests in their instructions; sewing it together with the yarn and the needle that come with each kit. However the gun covers are made, they all serve the main purpose of offering protection for the guns they hold.~ (Published in January 2018 issue)
Sorry, the comment form is closed at this time.